Operation Guide - Shopline Store 3D Upgrade
Step1: Submit 3D modeling requirements
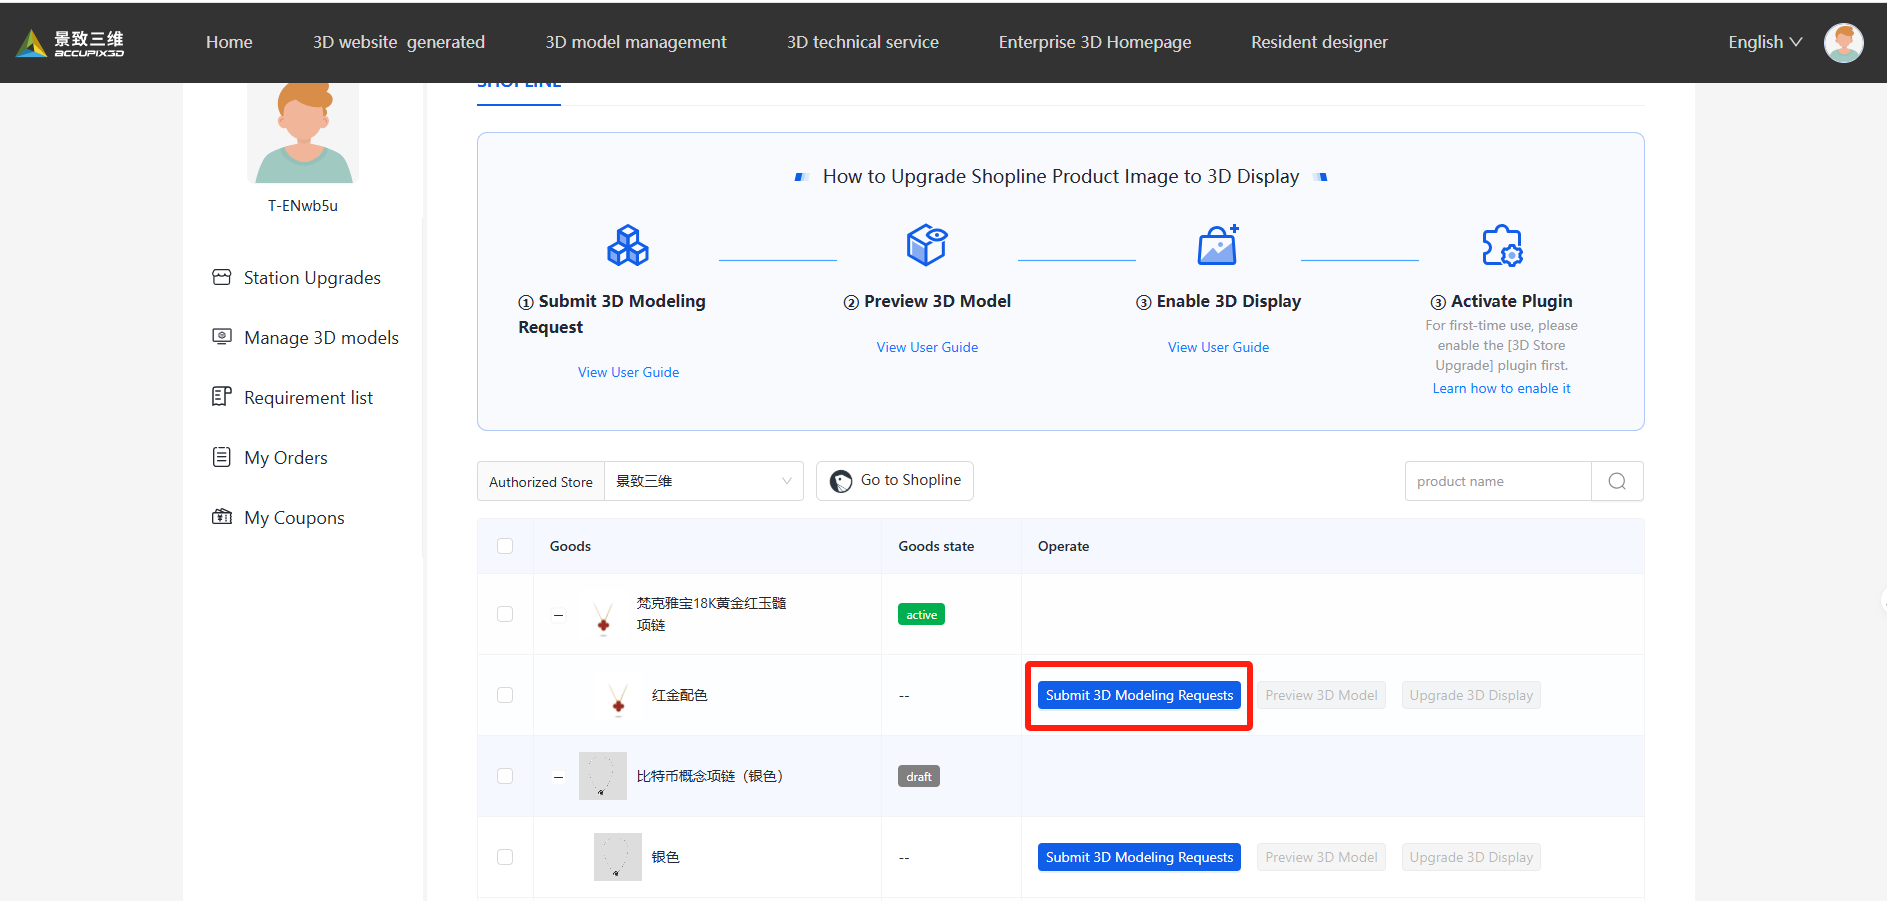
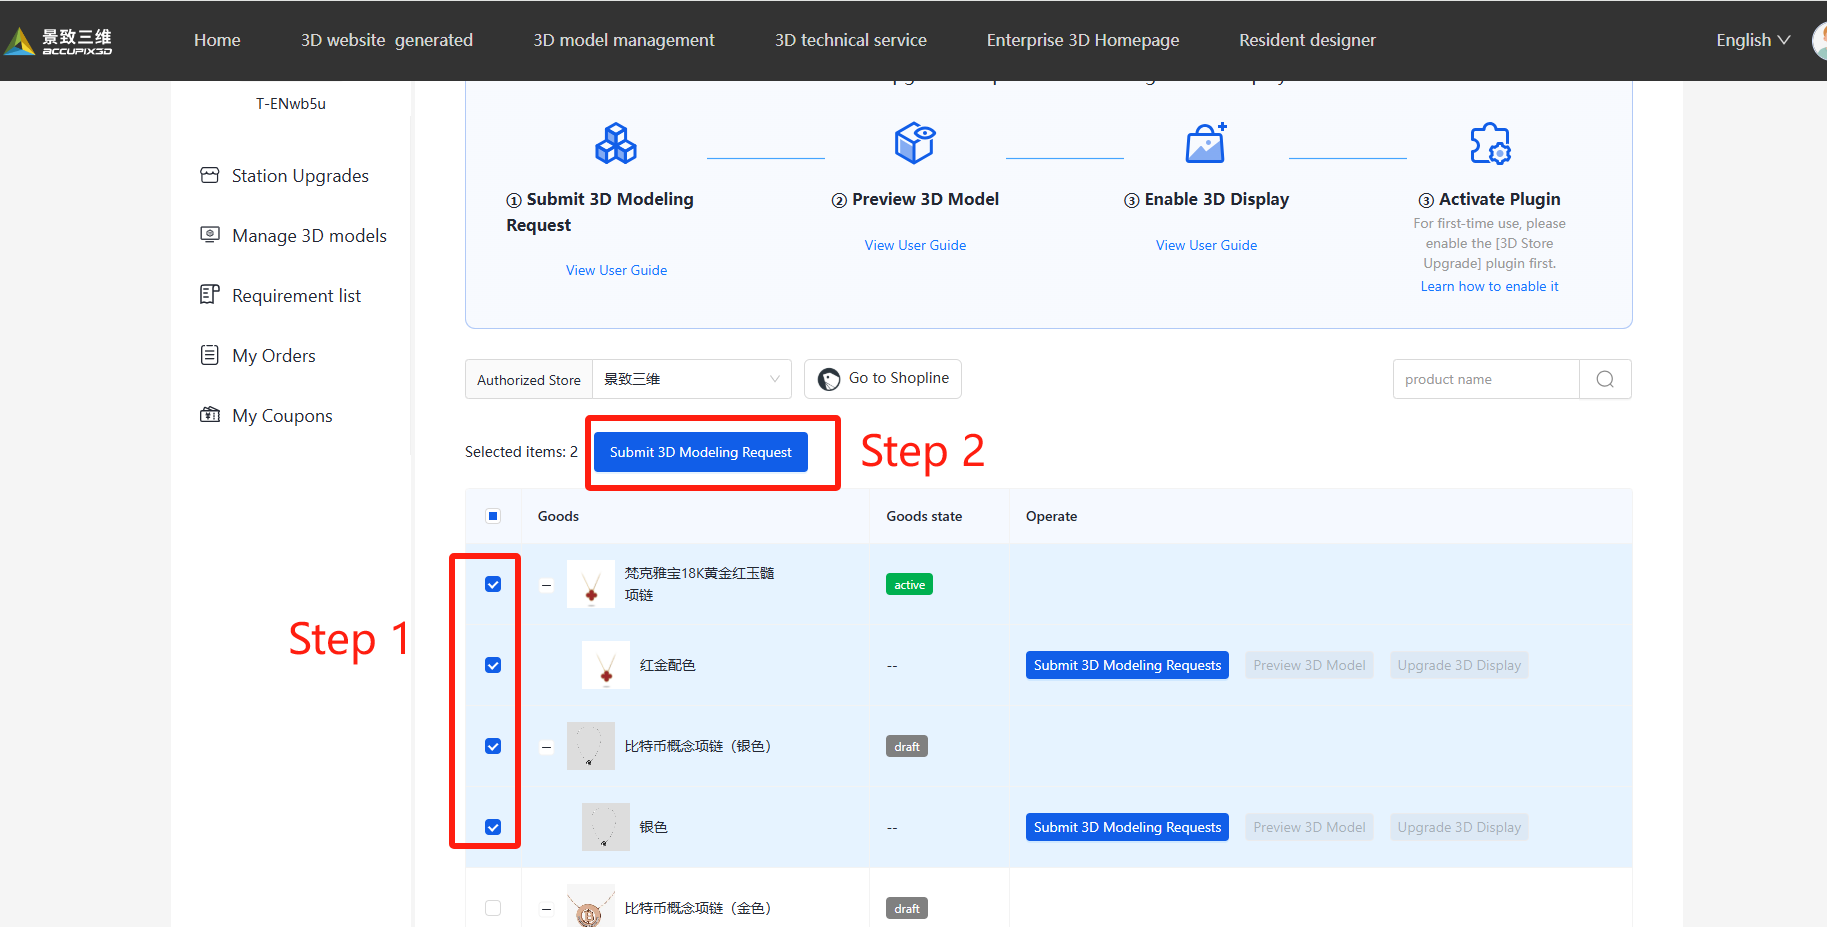
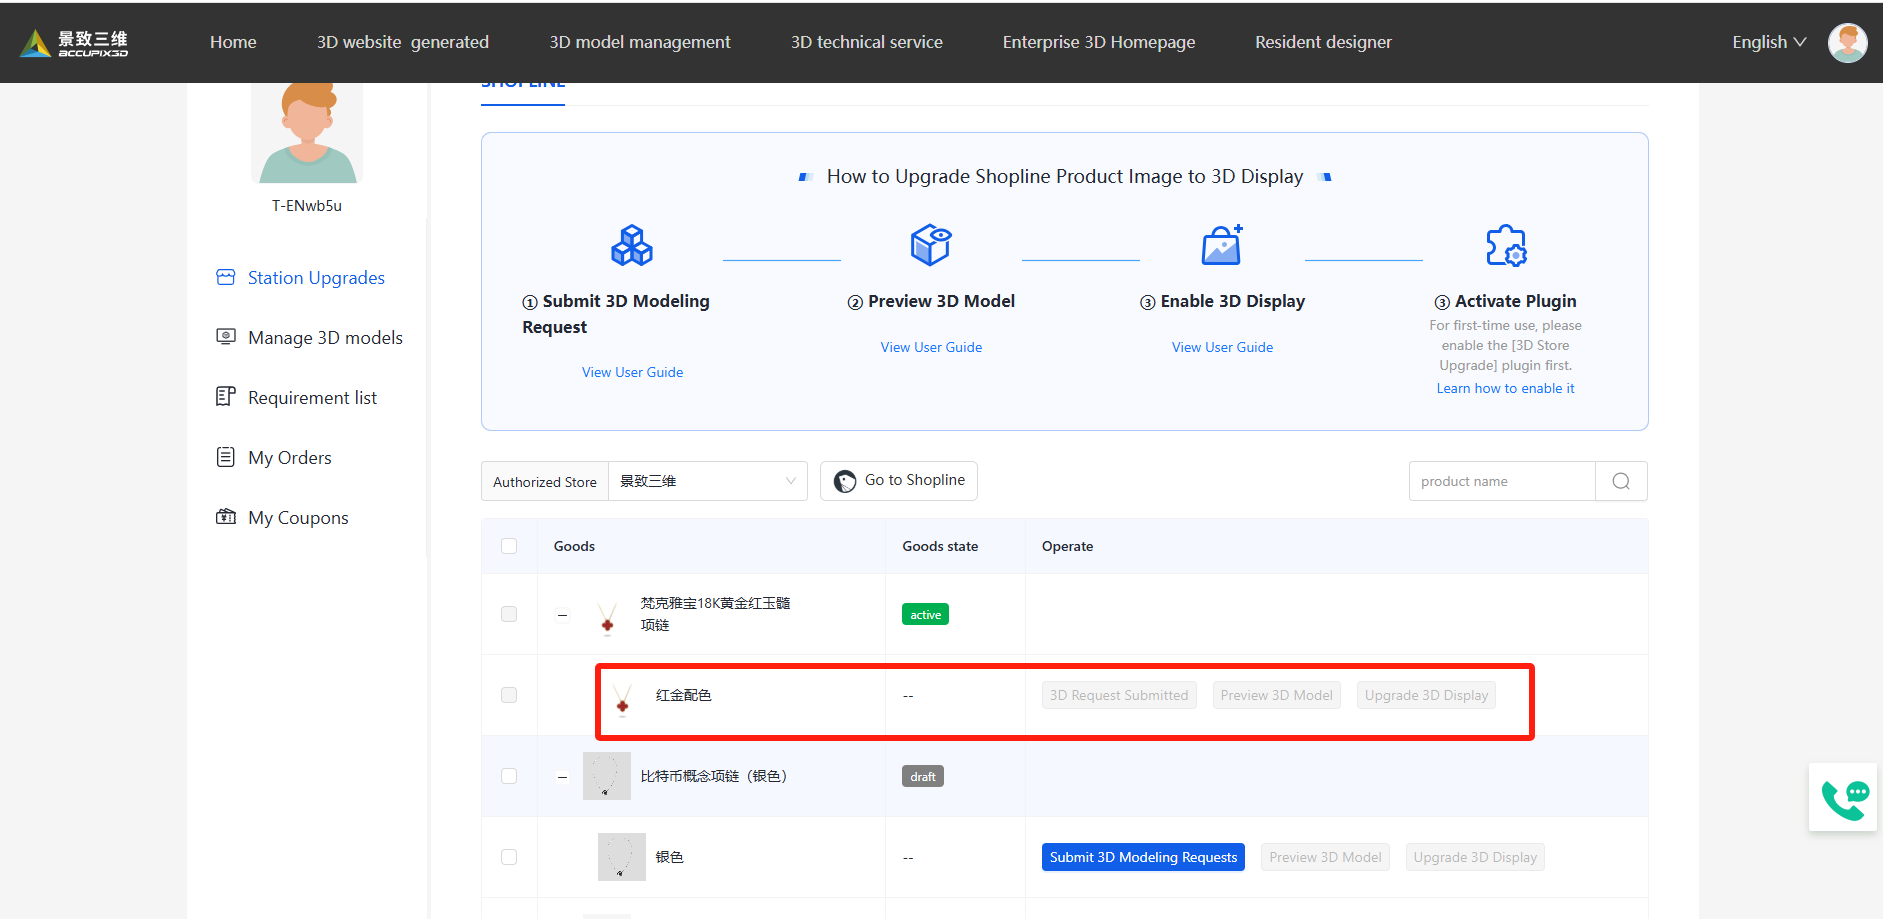
1.1 Select products needing 3D modeling
Select one or more product specs and submit your 3D request.
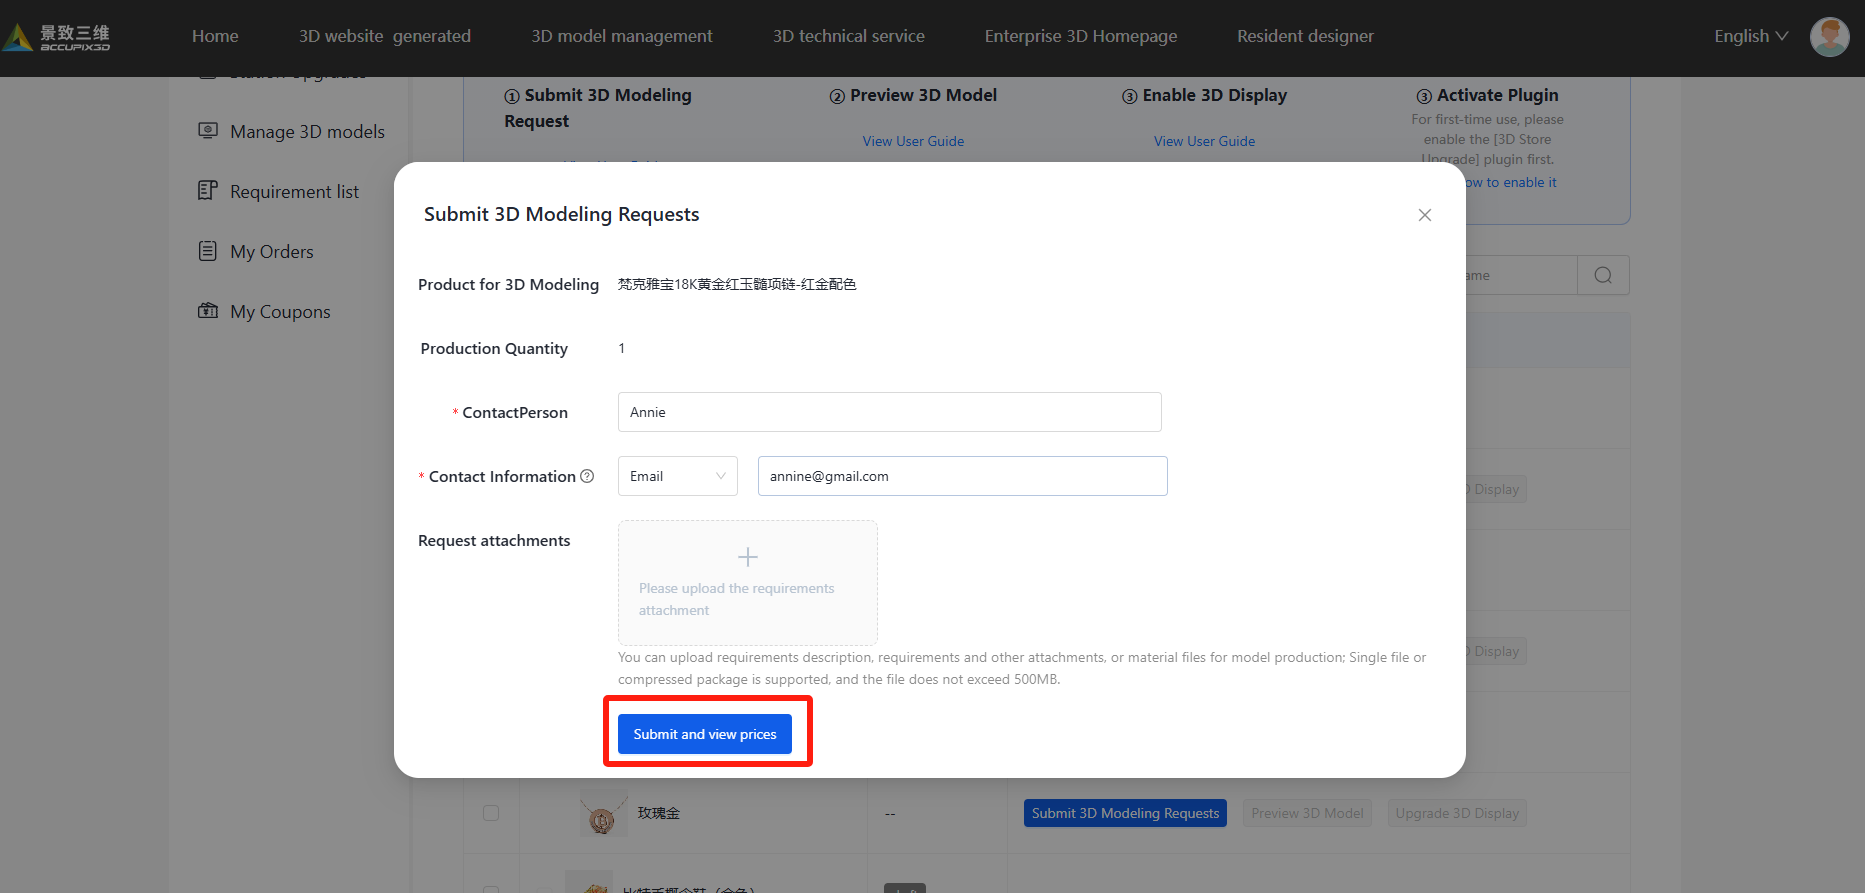
1.2 Confirm Requirements
Complete contact info, upload files, and submit request.
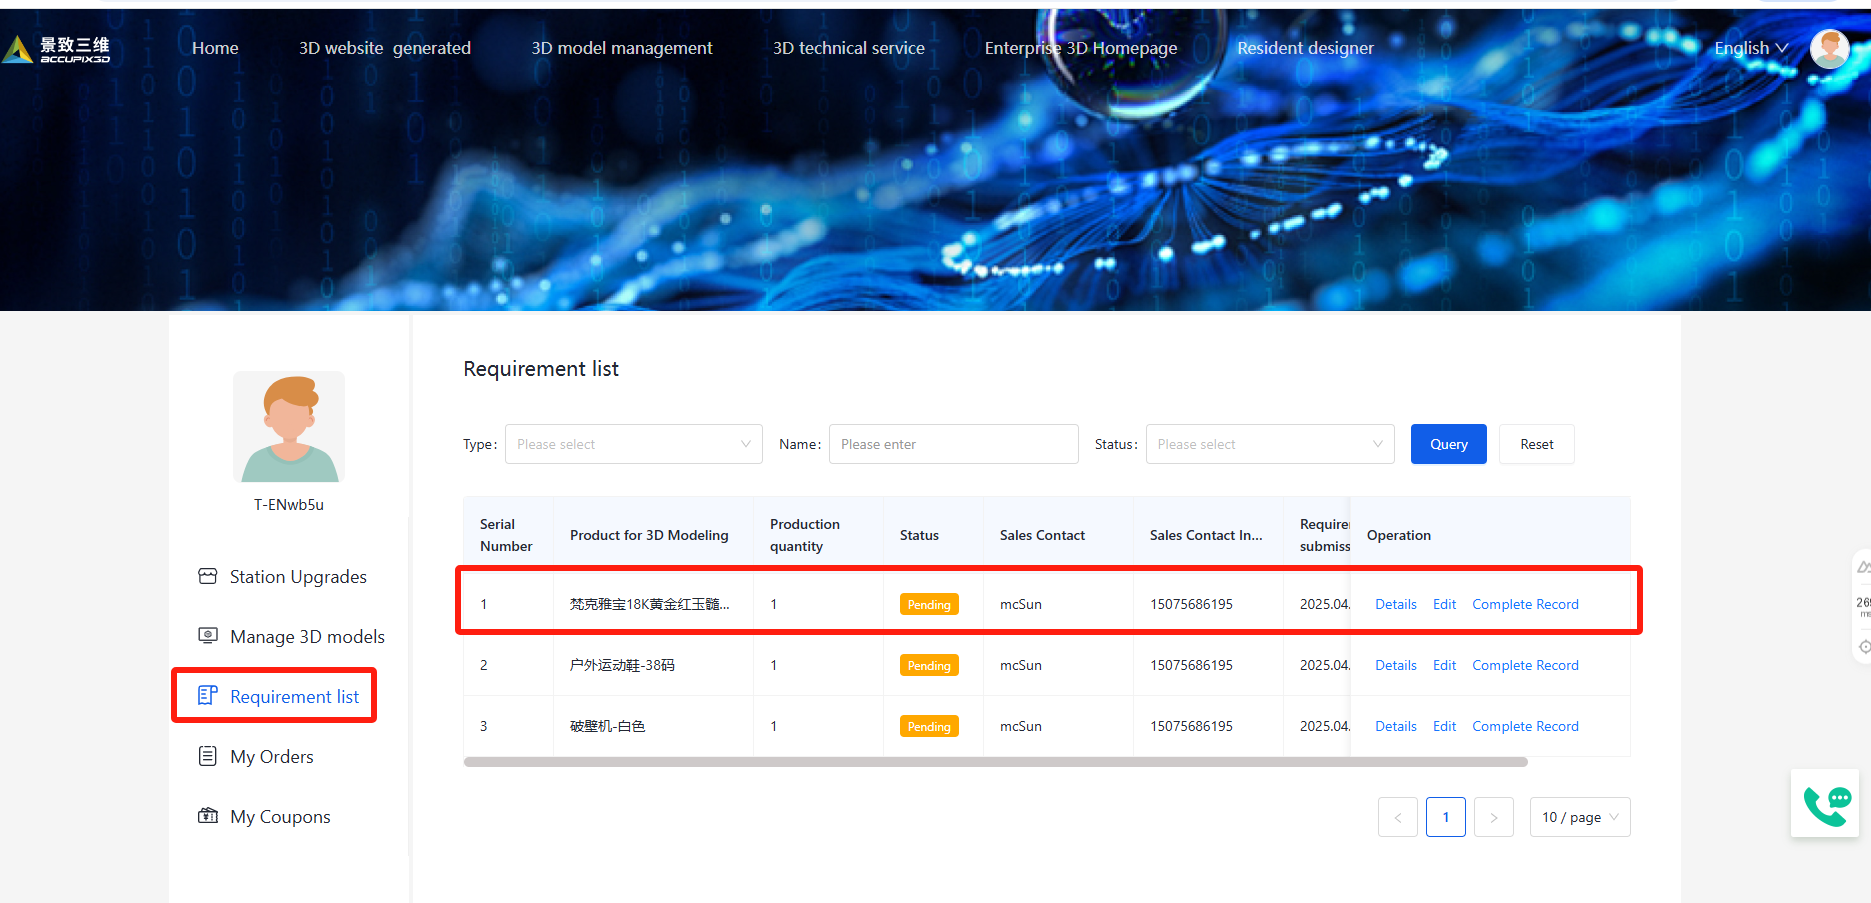
1.3 Awaiting Response from Platform
Upon submission of the 3D modeling request, the platform’s support team will initiate contact for verification and proceed to allocate a modeler for production. All submitted requests are accessible through the [Request List] in the left panel.
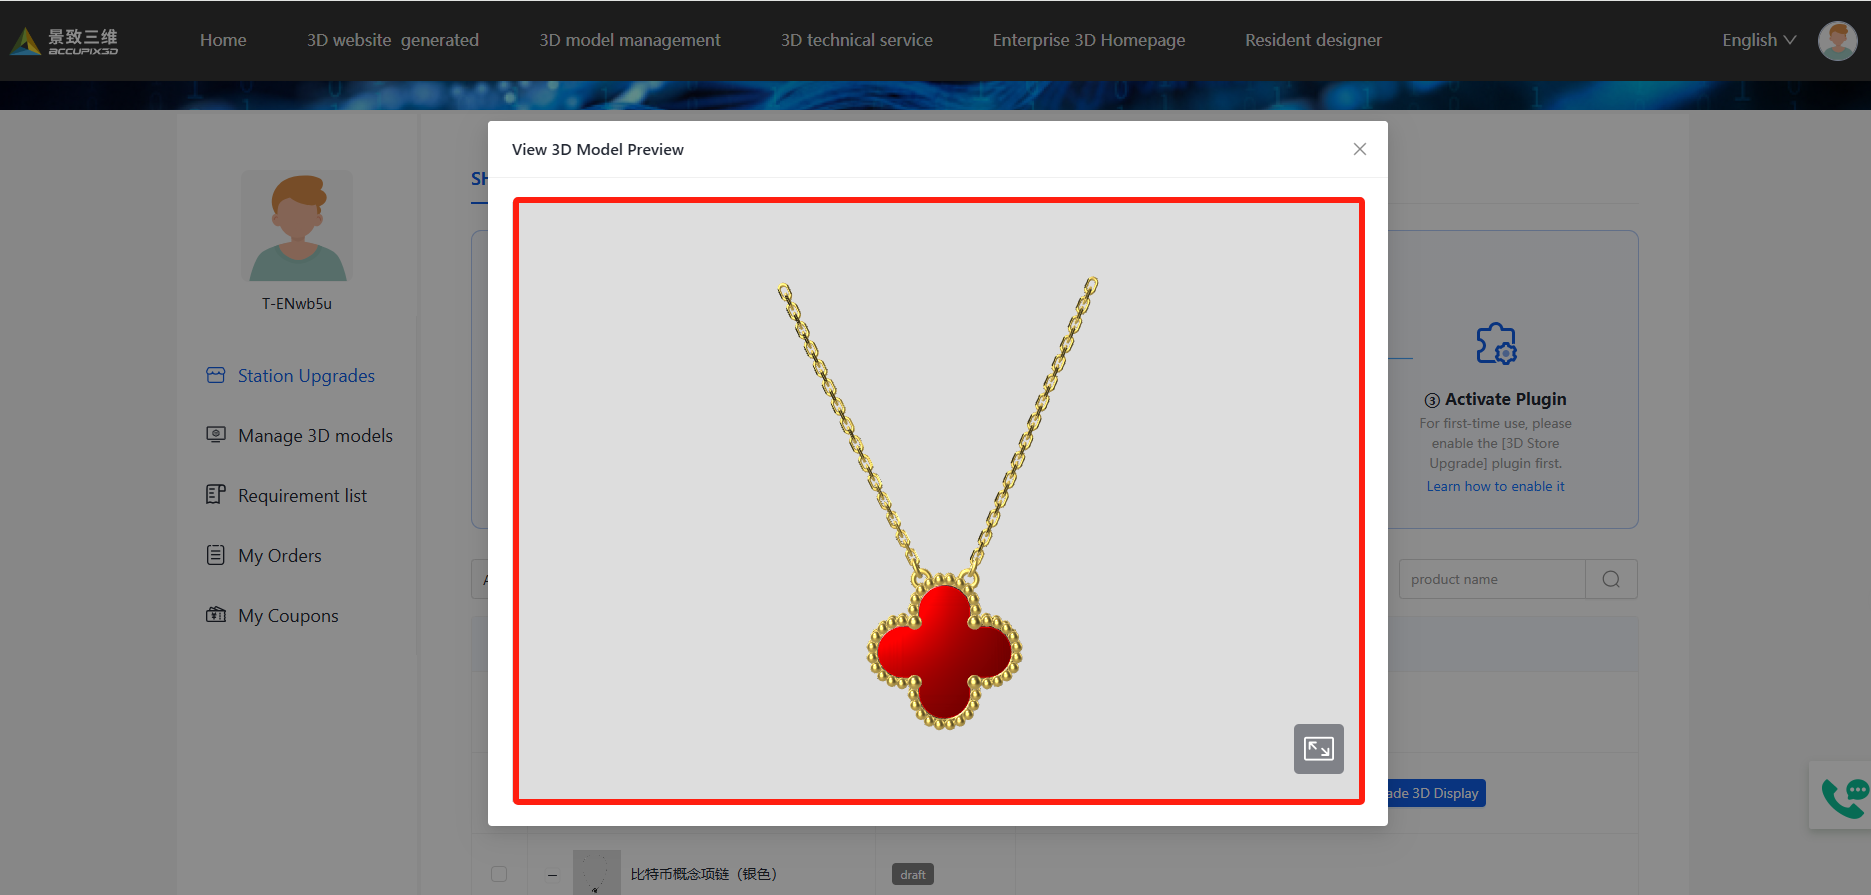
Step2: 3D Model Preview
After completion, click [Preview 3D Model] to check the model.
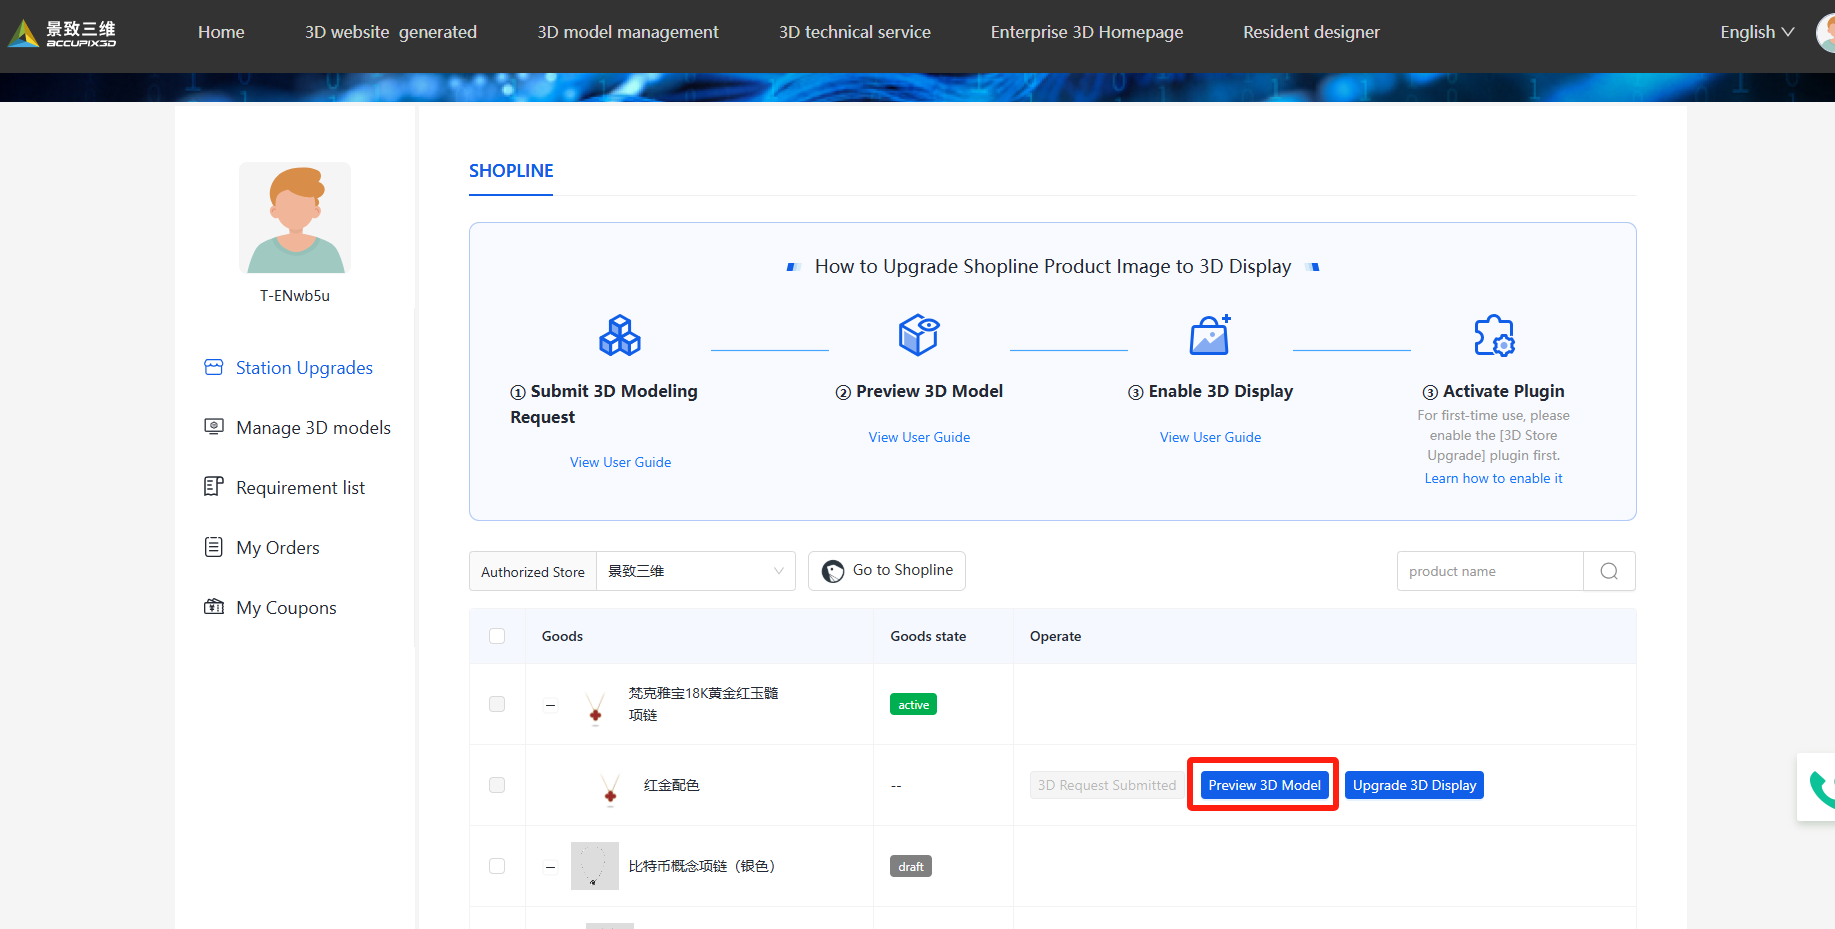
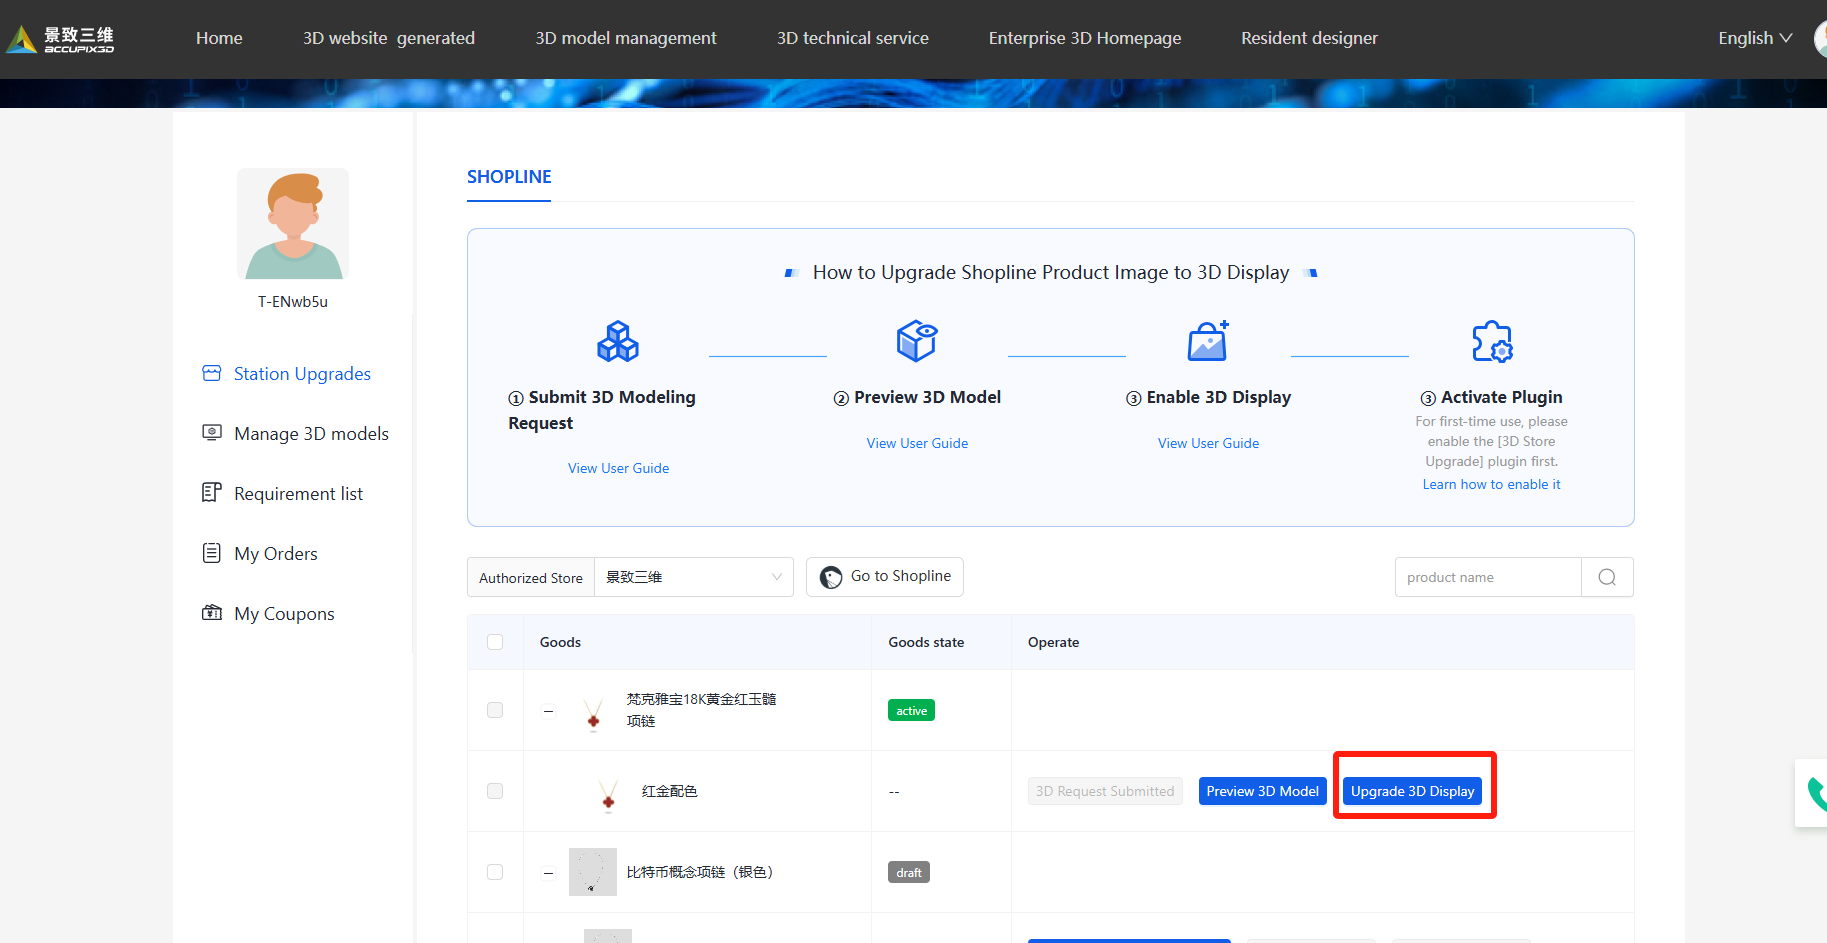
Step3: Upgrade 3D Display
Preview the 3D model to verify its details, then click [Upgrade 3D Display] to link it to your product.
Step4: Plugin Activation
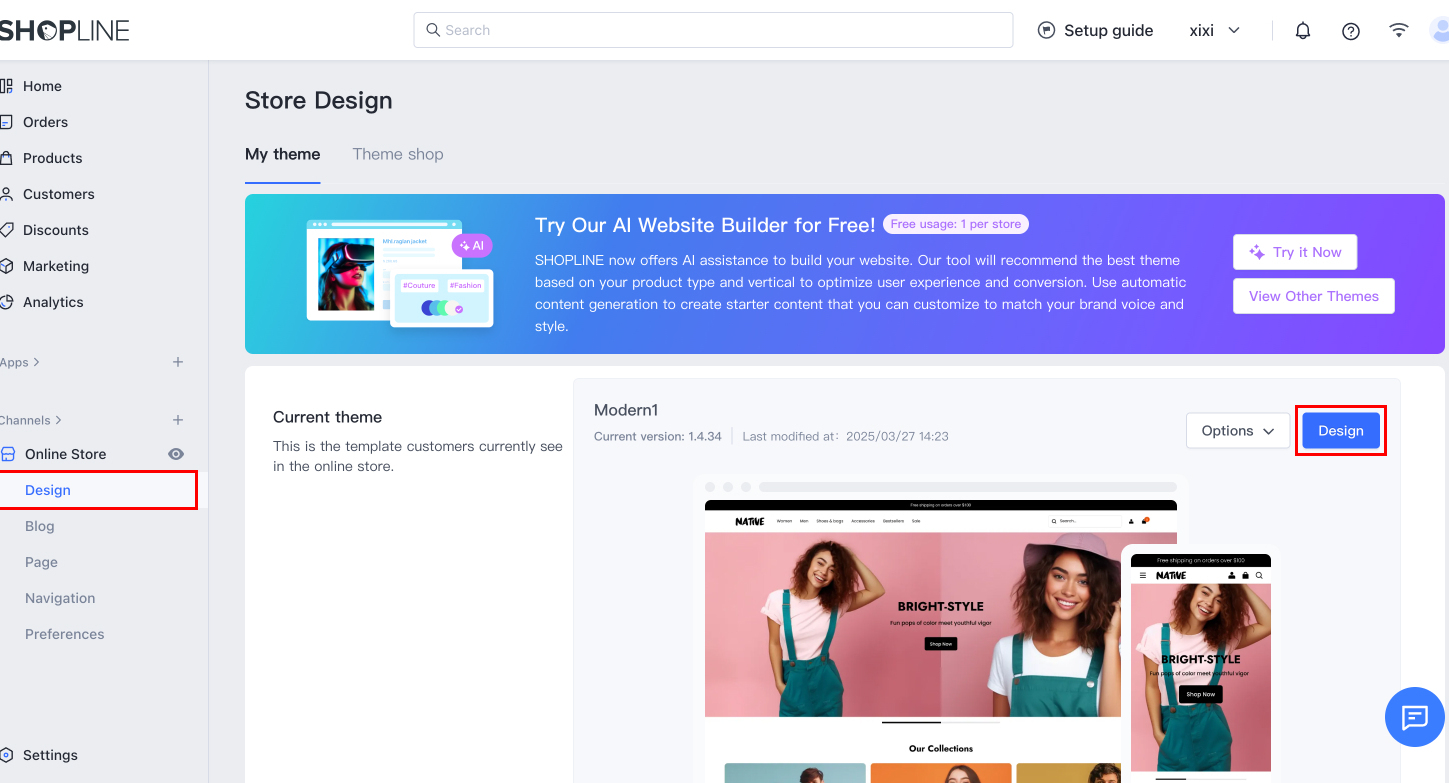
4.1 Enter Store Design
After the initial 3D model binding, you need to go to Shopline's [Store Design > Product Detail Page > App Embeds] to enable the app toggle. Only then will the 3D display of product images take effect.
4.2 Select Product Detail Page
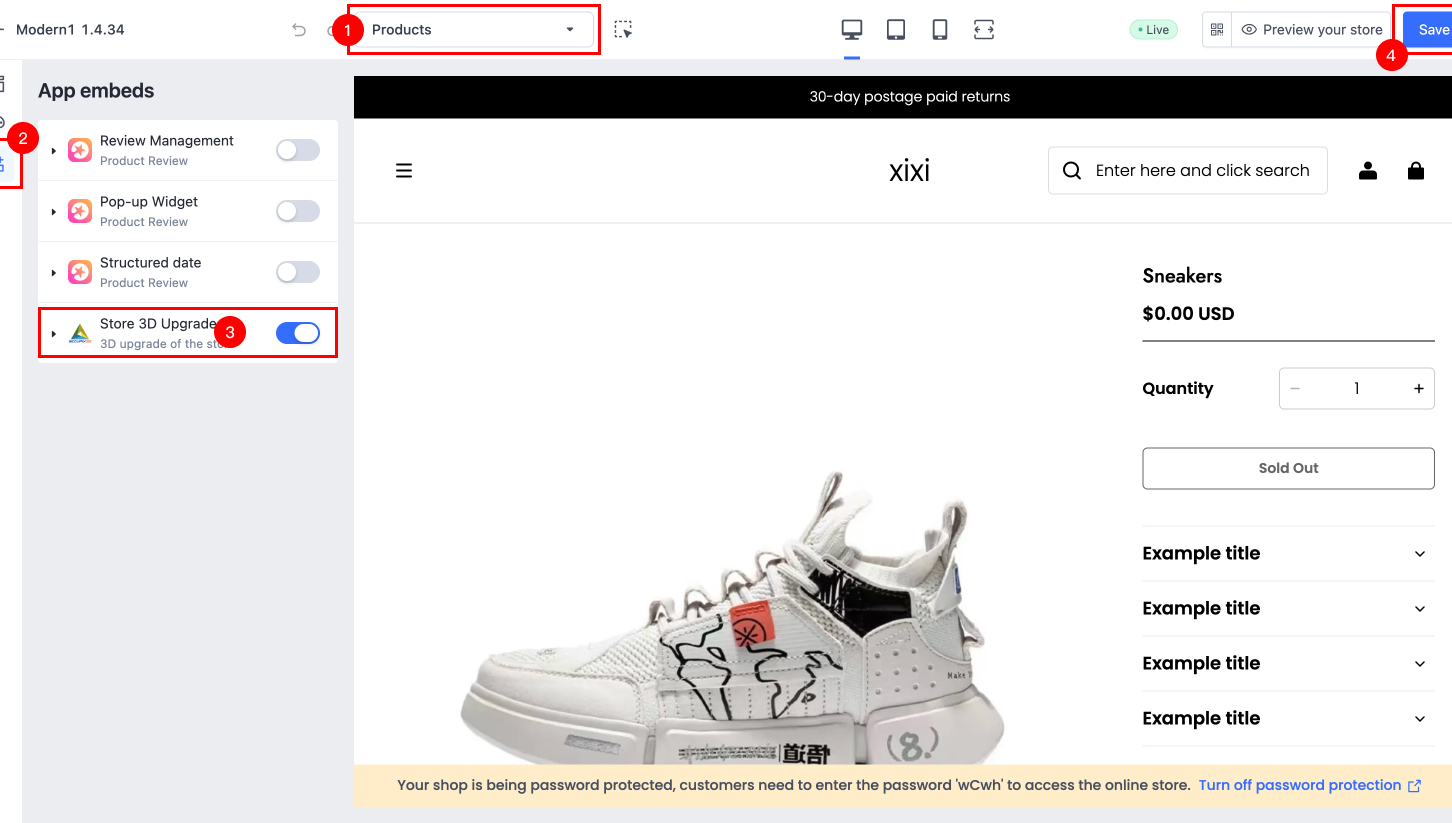
Select 'Product Detail Page' from the dropdown to edit.
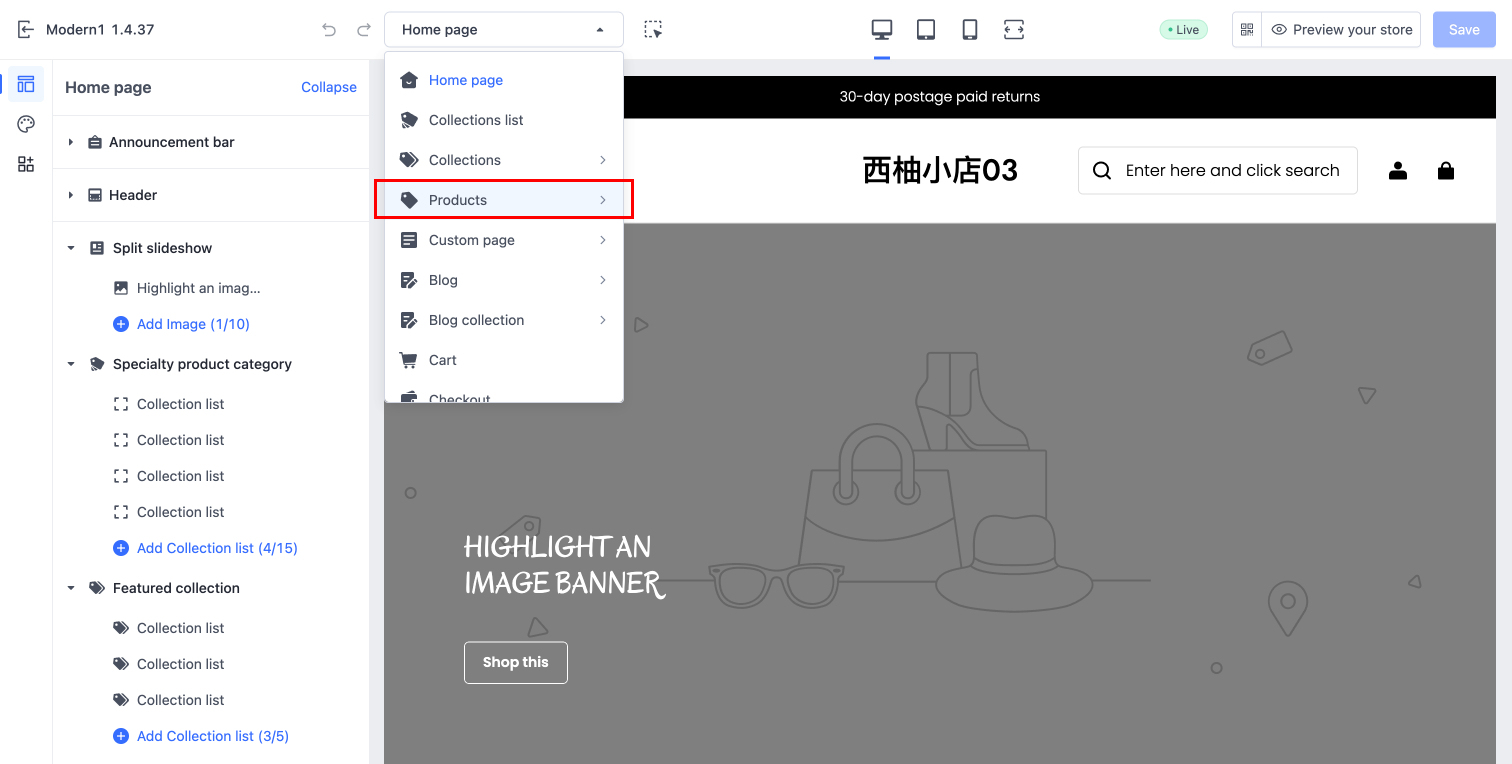
4.3 Enable the Plugin
Select Products > App embeds to enable the plugin switch. The 3D display for product images will only take effect once this step is completed. Do not forget to save your changes afterward (this is critical!!!).
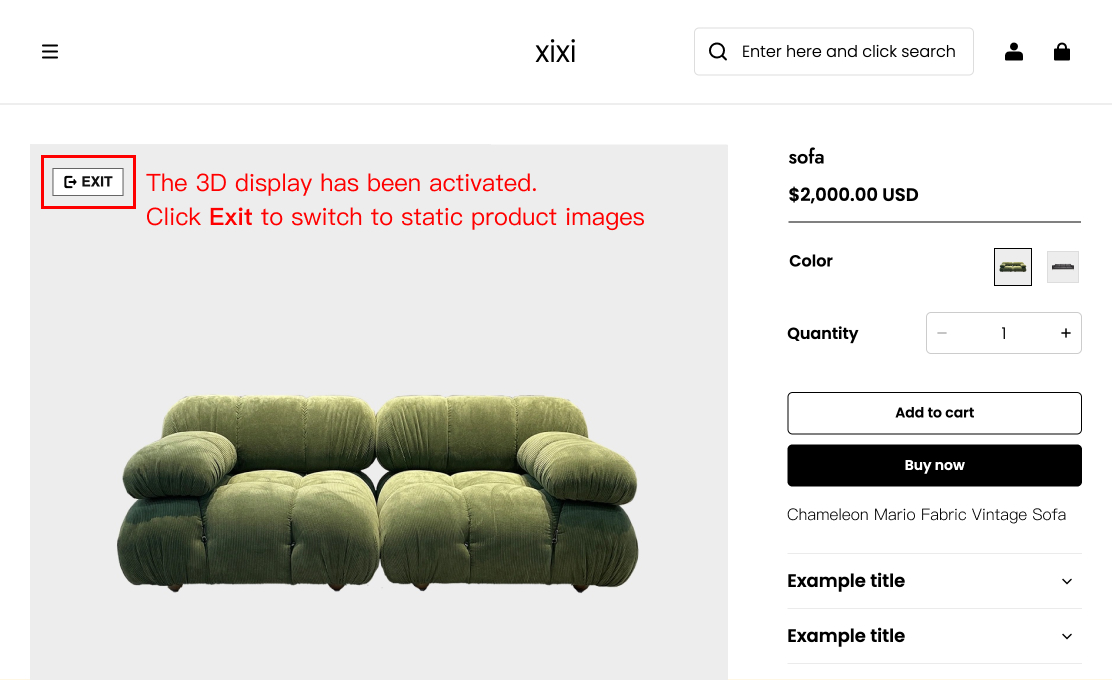
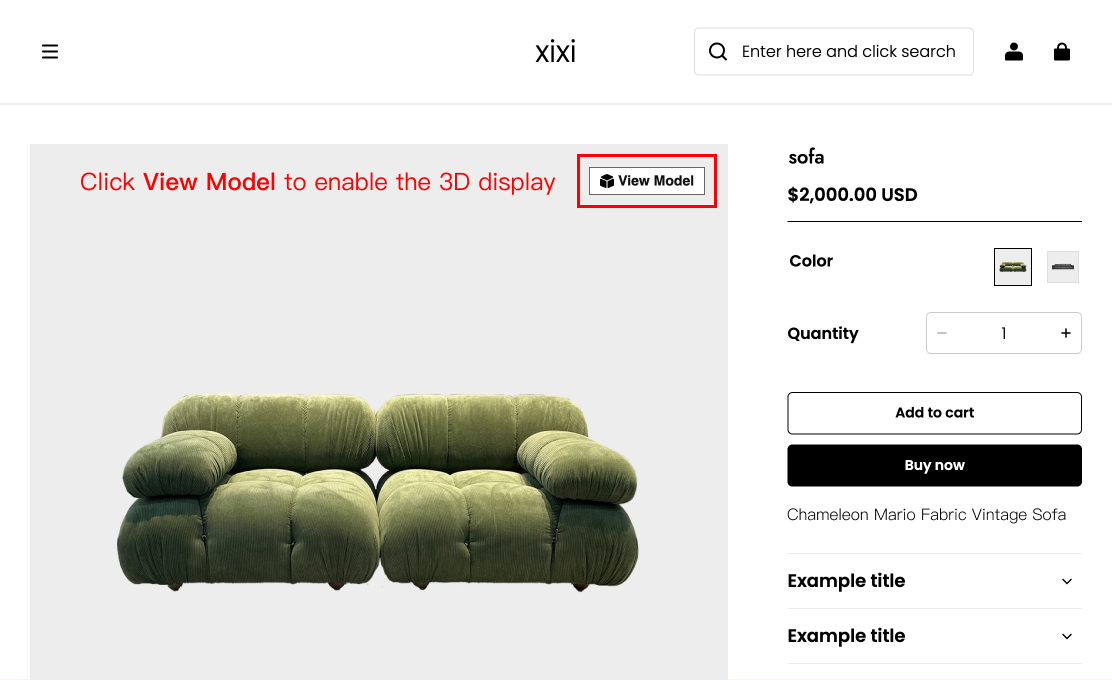
4.4 3D Display Upgrade Successful
You can preview the latest results in the Product Preview section.
FAQ
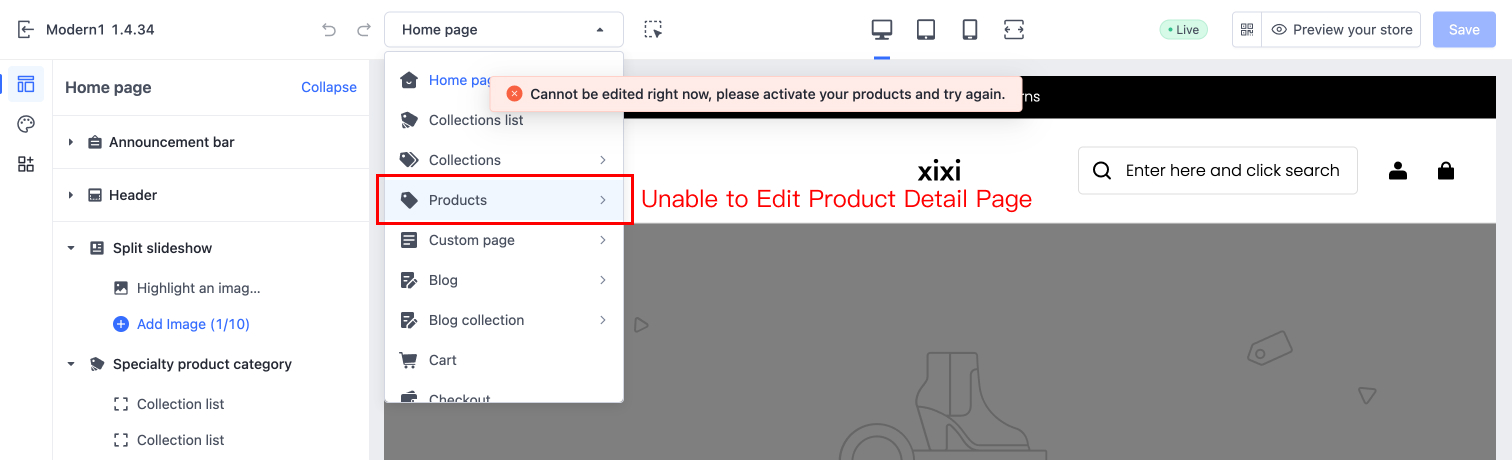
Q1:Unable to Locate the "App Embeds" Switch
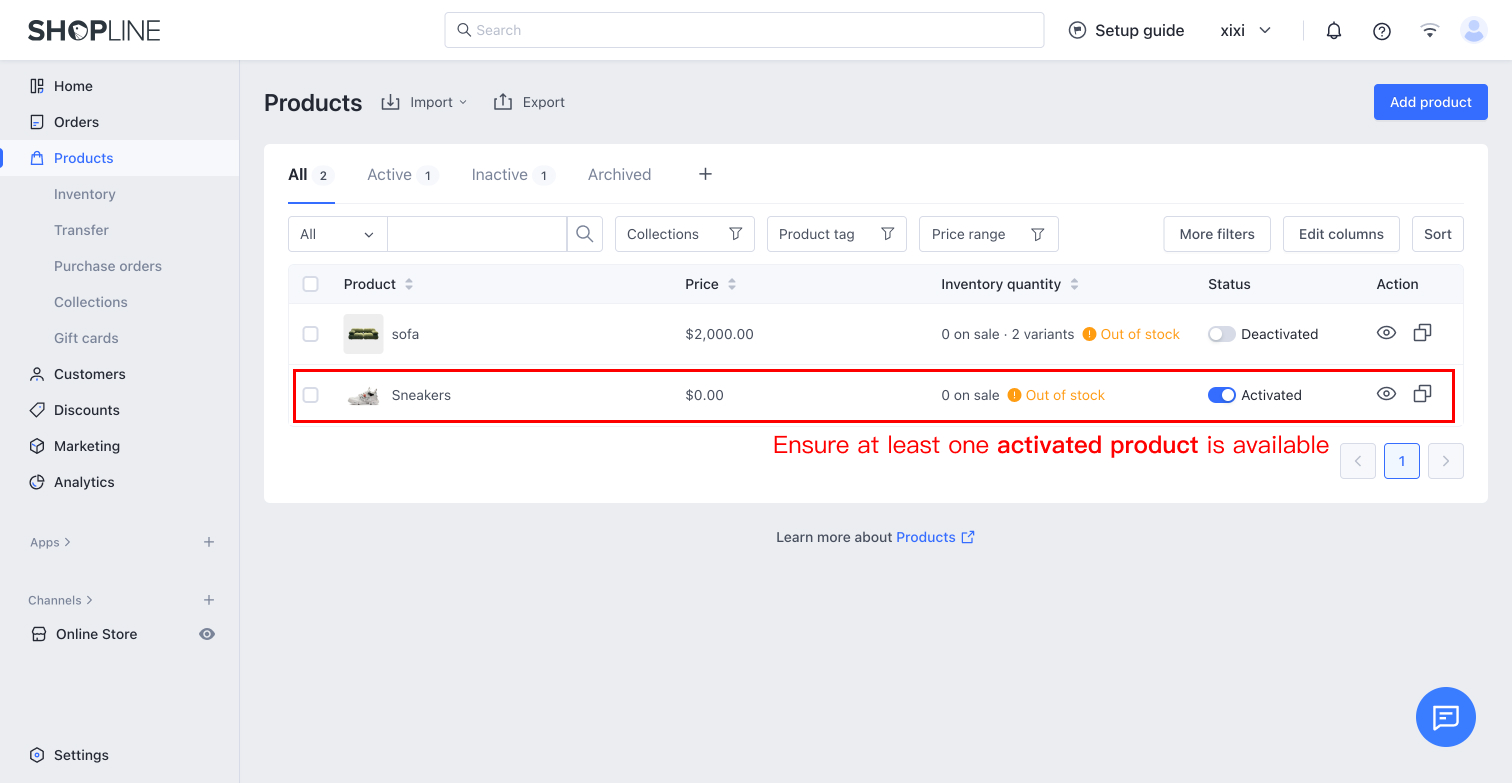
If your Shopline store has no activated products, you will be unable to select and edit the Product Detail Page section after entering Store Design. To resolve this, first activate at least one product, then navigate to the Product Detail Page editing module to enable the app switch.
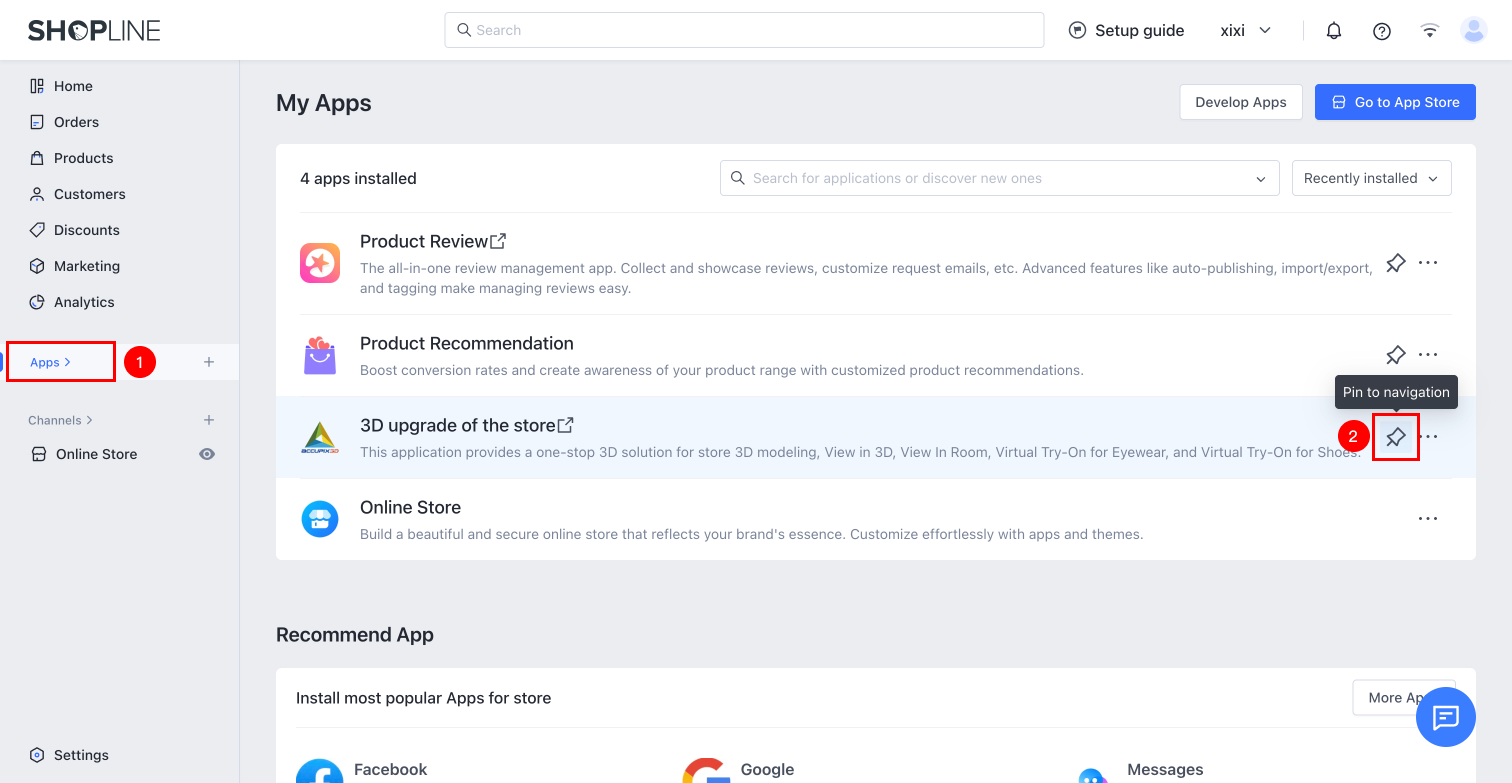
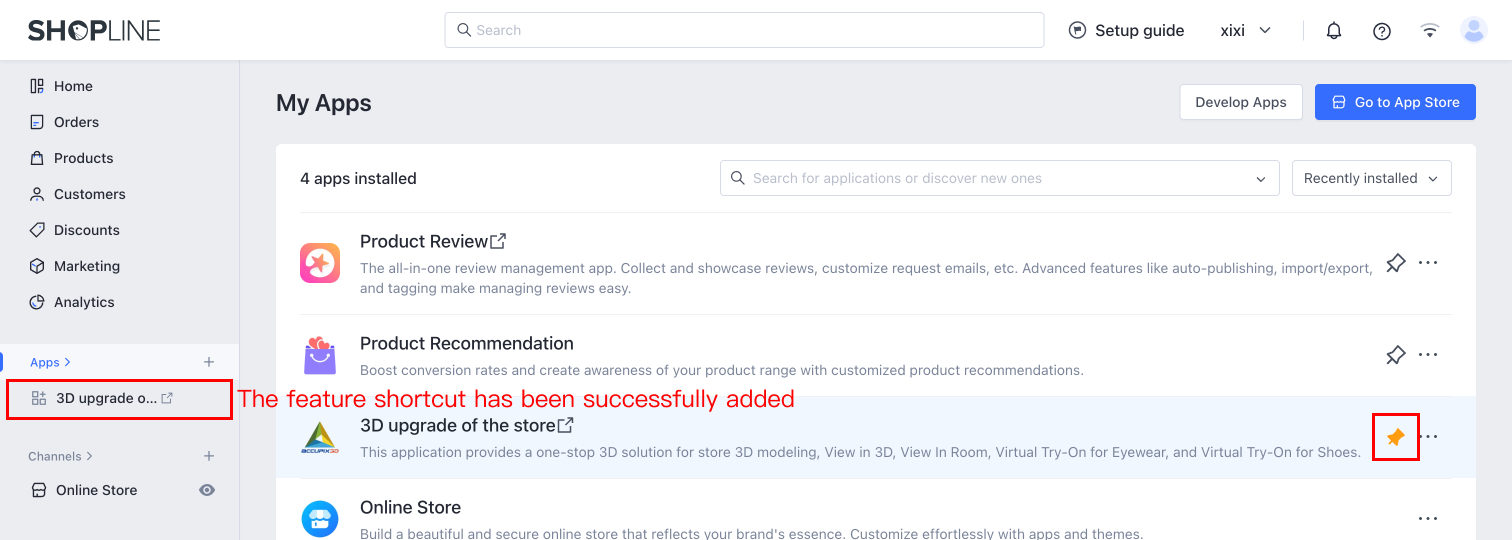
Q2:Having to Search Every Time for the 3D Upgrade of the Store App Is Too Inconvenient
You can pin 3D Upgrade Of The Store to navigation to manage 3D models at any time.